Thursday, May 12, 2016

You are so loved

Hello there!  I'm up on the CAS-ual Fridays Stamps blog today with a card using one of my favorite stamp sets from the new release, Tin Roof, and a lovely sentiment from Loving Thoughts!


I love stripes on cards and so I decided to use the Tin Roof stamp to make some stripes.  I stamped the smaller flower image 4 times on a piece of white card stock using Versamark ink, leaving space in between stamping.  This process is super easy if you have a MISTI because of the grid lines.  Then I embossed the flowers with white embossing powder.  Next I used some Micropore tape to mask off the white areas in between the embossed flowers and used my ink blending tool and Mowed Lawn distress ink to add color.  I trimmed that panel and placed it on a white card base.  The tag was die cut using the smaller tag from Scallop Tag Fri-Dies.  I stamped the sentiment from Loving Thoughts using Versamark ink and embossed in gold.  I cut some hearts from shiny gold card stock using Fun-Fetti Fri-Dies and placed them on the tag.  I placed some thin gold cord under the tag and made a bow for the tag with it.  The top picture shows the lovely shine of the hearts and sentiment and cord, it looks so pretty in person!  I really love green and gold together, how about you? 

Be sure to use my discount code below to receive 15% off your CAS-ual Friday purchase!


Thanks so much for stopping by today!

Monday, May 9, 2016

The Challenge #72

Hello my friends!  I'm here today with a card for The Challenge.  We have a really gorgeous color challenge for you this week, I just LOVE this combo!


I'll also be entering my card in the current My Favorite Things Wednesday Sketch Challenge.  It's been awhile since I've had time to play along with MFT and I'm thrilled I was able to work it in this week!


I started my card by stamping the flowers from MFT' Fall Florals using Wplus9 Bo Peep ink and Hero Arts Navy Shadow Ink.  I die cut some little yellow centers for the flowers using PTI Harvest Gold card stock and MFT Sequin Die-namics.  Next I stamped the hula girl from MFT Polynesian Paradise on white card stock and colored here with Copic markers.  The sentiment is also from Polynesian Paradise and I stamped with Versamark on black card stock and embossed in white.  I added a few leaves to my card die cut from MFT Leafy Greenery Die-namics, and a bit of twine.  I SO love how this turned out, these colors just make me happy :)

I hope you'll play along with us this week at The Challenge!  Be sure to visit Lesley's blog to see what she, the design team, and our guests have created to inspire you!

Thanks so much for stopping by today!


Craftin Desert Diva's Guest Designer

Hello, and happy Monday!  I'm thrilled to be guest designing this month for Craftin Desert Diva's!  I'll be sharing a couple of cards with you this week using a new stamp set called Enchanted Tales.  It's a 3X4 stamp set that coordinates with the previously released Magical Wishes.  Here's a peek of my card for today.


You can see the entire card on Facebook here.  There will be a chance for you to win today's featured stamp set, so be sure to comment at every stop on the Facebook hop!


Sunday, May 8, 2016

Reverse Confetti New Release May Blog Hop

Hello, so glad you stopped by!  The design team and our special Fetti Friends have some wonderful inspiration for you today using the new products, so be sure to hop along with us to check it out.  And all of the new products are now available in the Reverse Confetti store, oh happy day!!


I have another card for you today using the adorable LIFT ME UP and LIFT ME UP Confetti Cuts.


To make my card I started by stamping and coloring the giraffes and presents from LIFT ME UP using Copic markers.  Next I cut them out using LIFT ME UP Confetti Cuts.  I placed them on one of the PARTY TIME Quick Cut Panels.  On a white card base I placed a strip of patterned paper from my stash which I placed on red card stock and added the scallop edges using Edge Essentials Confetti Cuts.  I used some white glitter card stock to cut the garland using LINKED GARLAND Confetti Cuts.  I cut the red flag using Stitched Flag Trio Confetti Cuts, and stamped and embossed the sentiment from CELEBRATIONS in white.


For this card I used CANDLES 'N CONFETTI and stamped the cake and cake pedestal repeatedly on a white card base.  Next I stamped a cake and pedestal and flowers and colored with Copic markers.  I die cut them, along with some of the scallop pieces, using CANDLES 'N CONFETTI Confetti Cuts.  I added some stickles to the centers of the flowers.  It was so FUN to decorate this cake.  I'm not very good at cake decorating so playing with these paper cakes is perfect for me ;)  I stamped the sentiment from CELEBRATIONS on a strip of purple card stock and embossed in white.  I added a strip of white glitter card stock behind the purple strip and placed it on my card, then I used some foam tape to add the cake.

Now it's time to hop along to see what the rest of the design team, and our fabulous Fetti Friends, have created!


‘Fetti Friend–Laura Bassen
‘Fetti Friend—Wanda Guess
‘Fetti Friend—Thanh Vo
‘Fetti Friend—Candi Billman


Saturday, May 7, 2016

RC Turns 3: Day 3

Hello there, the party continues here and on the Reverse Confetti Blog today!  I hope you're enjoying the festivities!


Today I have 2 cards to share with you using the new BOXES 'N BALLOONS stamp set and coordinating BOXES 'N BALLOONS Confetti Cuts.


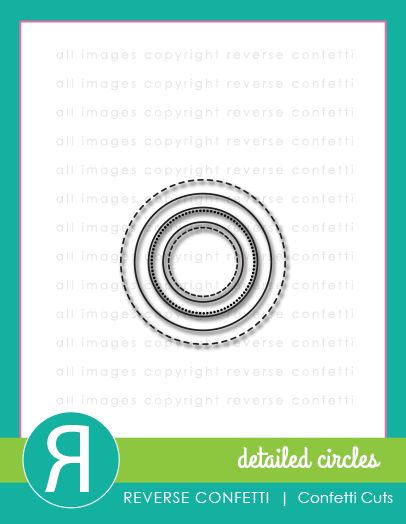
For my first card I stamped 2 of the sentiment balloons from BOXES 'N BALLOONS, along with 2 bows, and cut them out using BOXES 'N BALLOONS Confetti Cuts.  I thought that the new LINKED GARLAND Confetti Cuts would make a fun "string" for my balloons so I cut them from coordinating card stock to match the balloons.  I placed the balloons on one of the PARTY TIME Quick Card Panels.  Notice the card stock behind the quick card panel, I used the new DETAILED CIRCLE Confetti Cuts (before cutting them apart) to add some detail to my background.  I simply cut them out 3 times from the same color card stock and glued them down.  It's subtle but fun, don't you think?  I finished the card by adding a few clear sequins.


For this next card I wanted to use some of the fun patterns in the PARTY TIME Quick Card Panels to make some balloons, so I used the balloon die from BOXES 'N BALLOONS to cut them out.  I also used some thin strips of the same Quick Card Panels to make the border at the bottom of the card.  At the top of my card I used the new FALLING CONFETTI Confetti Cuts.  I used some of the white card stock pieces of confetti after die cutting and colored them with Copic markers in colors that matched the balloons, and inserted them back into the holes for a fun, colorful look.  I used some white glitter card stock on my card to make bows, along the bottom border, and for some of the confetti at the top.  I stamped the sentiment, from CELEBRATIONS, in black.


There are some fabulous prizes this month, 3 lucky commenters will win a $30.00 gift certificate to the Reverse Confetti store, so you'll want to be sure to leave a comment on all of the design team blogs and on the Reverse Confetti Blog by 5:00 PM central time today!  There's also a 30.00 prize up for grabs on the Reverse Confetti Facebook page so be sure to visit there too.

Be sure to join us tomorrow for our blog hop showcasing the new products.  We also have several special Fetti Friends hopping along with us, you won't want to miss it!


Friday, May 6, 2016

RC Turns 3: Day 2

Welcome back to day 2 of the birthday celebration for Reverse Confetti, RC Turns 3!  I hope you had fun yesterday, and I know you're going to love today's new products!


Today we have a wonderful cake building stamp set called CANDLES 'N CONFETTI, along with the coordinating CANDLES 'N CONFETTI Confetti Cuts.  There's also an awesome new sentiment set called CELEBRATIONS, I love that there are sentiments in this set for a variety of occasions!


To start my card I stamped and colored the cake and pedestal from CANDLES 'N CONFETTI using Pitt markers, then I die cut them using CANDLES 'N CONFETTI Confetti Cuts.  For the card base I used 2 new Confetti Cuts that are being released this month (you're going to love these, I know I do!)  I started with a black card base, and then using the new COVER PANEL: BIG STRIPES Confetti Cuts, I die cut some white card stock.  Next I used one of the circle dies from DETAILED CIRCLES Confetti Cuts to add the stitched detail around the center of the white die cut piece.  I stamped the sentiment from CELEBRATIONS in black, and used some foam mounting tape to pop up the cake.  I finished the card with a few colorful sequins to match the colors in the cake, along with a few clear sequins.  This card was quite easy to make, but I think it has a bold, graphic look, which I really love!  There are SO many ways to decorate the cake and I'll have another card using these wonderful sets to show you on the hop on Sunday ;)


There are some fabulous prizes this month, 3 lucky commenters will win a $30.00 gift certificate to the Reverse Confetti store, so you'll want to be sure to leave a comment on all of the design team blogs and on the Reverse Confetti Blog!  There's also a 30.00 prize up for grabs on the Reverse Confetti Facebook page so be sure to visit there too.

Be sure to stop back tomorrow to see more amazing new products!

Thursday, May 5, 2016

RC Turns 3: Day 1

Hello, friends!  I'm so glad you stopped by today because there's a big ole' party starting on the Reverse Confetti blog, and you don't want to miss it!  We're celebrating Reverse Confetti's 3rd birthday and we've got some fabulous new stamps and dies to show you over the next few days!


What better way to start the party than with an adorable new critter set!


This new stamp set is called LIFT ME UP.  Aren't the giraffes adorable?!  For this card I decided to use lots of color in the background and keep the images black and white.  As much as I enjoy coloring, there are times when you need something that comes together very quickly and this technique allows for that.  I started my card by stamping the sentiment from LIFT ME UP on the banner paper from this month's PARTY TIME Quick Card Panels.  I placed the sentiment on my Misti, curving it to follow the curved line of the banner.  I stamped the 2 giraffes, cupcakes, and 2 birds, and cut them all with the LIFT ME UP Confetti Cuts.  I added foam mounting tape to the back of the die cut images and placed them on the card.  For the pink paper in the background I used Edge Essentials Confetti Cuts to die cut the dot border around the edge.  I love the extra detail this adds to the card.  I finished the card by adding some yellow and white baker's twine and a few clear sequins.  I just love how this turned out!


There are some fabulous prizes this month, 3 lucky commenters will win a $30.00 gift certificate to the Reverse Confetti store, so you'll want to be sure to leave a comment on all of the design team blogs and on the Reverse Confetti Blog!  There's also a 30.00 prize up for grabs on the Reverse Confetti Facebook page so be sure to visit there too.


Thanks for stopping by today and be sure to stop back tomorrow as the party continues!